Pages

Subscribe:
Showing posts with label before and after. Show all posts

Sunday, August 19, 2012

And so now...I have my very own shop! With a door and a key.

Well, not quite yet...but soon!
Sometimes things change quickly. Less than a year ago I set up my own business and started promoting my ventures online. In January I set up an Etsy account, in May I started selling at Yeadon's bookshop in Elgin and I've done a number of craft/vintage fairs since last Christmas.

(Oh yeah, I also had a baby)

It is August now and I have just got the keys to my very own studio & shop space. Eeek! What's going on?! Am I scared? Yes, I am!

It is out in the sticks and not on a busy high street, so I am going to have to shout loudly to draw attention! Nevertheless, it is hugely exciting and I will be part of a lovely old building housing other creative people who make furniture - and even complete handmade kitchens (the woodworking workshops there would make any joiner drool!). Oh yes, and it has lots of parking space (try to find that in a city!).

It will be my own little work space where I can let my creative juices flow, paint, sew, design, make and also show off and sell my furniture, vintage, unique and handmade homeware and other nice things. I hope to make it a fun, inspiring and welcoming place to be, where people can come and spend some time, find inspiration, join me in creating things - or just catch up over a cup of coffee.

But first things first: redecorating! An opening party will follow. Promise.

x


Nina's Apartment will soon be located at:
 

Lethenty Mill
Inverurie
Aberdeenshire
AB51 0HQ

Sunday, August 12, 2012

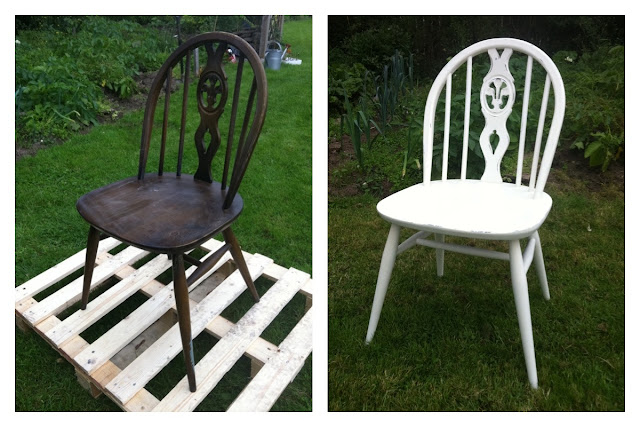
Ercol chair makeover with Annie Sloan paint

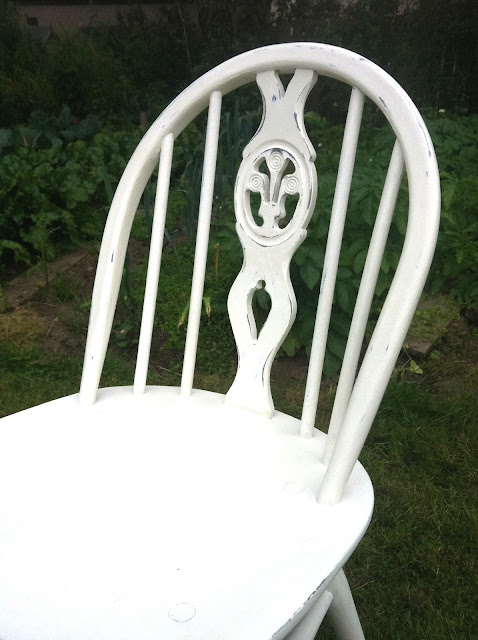
Just a quick post to show you a before & after shot of a chair I've been doing up this weekend. It's an original Ercol chair, probably a 1950s one. I have two, so once they're both done they'll make a great pair in someone's kitchen!

I painted them in Annie Sloan white chalk paint with on top a mix of the white with a bit of Farrow and Ball Old White through it. Distressed it with some fine sand paper at the end and put a clear wax coat on it.


Wednesday, November 2, 2011

Wardrobe makeover in Aubusson and Duck egg blue


I am proud to finally present to you the result of my £20 wardrobe makeover! Got it months ago from Banchory's Box Room (great for finding old furniture) and I eventually painted it and did it up. I love the combination of the blue and the brass hinges. It is now baby's first antique piece - holding all its baby grows, cute little cardigans and mini socks.

I painted the inside of the wardrobe in Annie Sloan's duck egg blue chalk paint and the outside in her Aubusson blue shade (with a layer of duck egg blue underneath which shines through after I lightly sanded through the corners and edges). I also stuck some blue-green retro fabric against the inside back panel of the wardrobe. My sister, who has been helping me finish the nursery over the past few days, put in an extra shelf (which she made out of our old bed slats!) and we got some useful storage boxes for underneath. She also saved me some money by suggesting using an old broom stick as a clothes rail and painting it in the same colour as the wardobe. Neat!

I'm very pleased with the result - hope baby likes it too when I show it its room for the first time next month ;-)


The broom stick clothes rail and bed slat shelf!
My hard working sister 'handy An' - :-)


Monday, August 29, 2011

Thonet chair makeover using Annie Sloan chalk paint

I have started a new project for the nursery; painting a £20 old dark brown wardrobe, but as that hasn't been finished yet, I will show you a small project that I did while waiting for the paint to dry.

Some years ago I bought a couple of the classic type Thonet chairs for little money, the ones you often see in pubs. As I was attacking my old wardrobe with Aubusson Blue paint from Annie Sloan, I thought, hey, that might look good on a chair too! I left the seat unpainted (just gave it a coat of wax), which I think goes quite well with the blue-grey colour. What do you think? Improvement?

Chair1

The chair before and after the paint layer:

Chair2


Friday, August 26, 2011

Our patio makeover. Where natural stone meets lavender.

7

Maybe some of you remember my post from last year about our patio project? Well, I am pleased to let you all know that it has now been FINISHED! Well, at least, as far as the actual patio area goes. The edge from patio to rest of the garden is still another little bit of work that we need to look at later. Yes, later. Like, next year. But gosh, am I happy that it is done, even though Summer is almost over! It's only been ten months! Still, it's been worth the wait and all the hard work.


Here are some before shots to refresh your memory...

33572_443067922475_607772475_5563179_6676899_n

33650_443066137475_607772475_5563162_2799_n


And....here is the finished patio:

4
11

6
3


The outer ring of pebbles we did ourselves and took absolutely forever, preparing the ground, placing cement, deciding on the pattern, tapping them all in and making sure they're  level. And you can't do these things in rainy weather!

8


As for the planting I choose bamboo plants for the top bed (as we'd like them to give us some more privacy in the future and bamboo is meant to grow fast!) and lots of alpine plants and sedums for the top of the wall. I choose lavender for pots and the lower beds to match the purple slate. The small tree in the pot is an olive tree (that only gets put out for a little while in Scotland!).

5
1
12


I love the old oak plank that has been built as a bench into the drystone wall:

9
10

Our patio certainly has a lot of creativity, love, blood, sweat, tears - and a hell of a lot of rocks - in it. I love the natural stone, the different textures, patterns, the purple shades and the way it looks like it's always been there. Concrete slabs may be quicker, but this patio will sure bring us (and the cats ;-) many years of joy.

14

Wednesday, July 6, 2011

Bedside table makeover

I've been on a roll ever since I found the Annie Sloan chalk paint and more and more pieces of furniture in my house are getting covered in duck egg blue. Maybe it's time to get another couple of colours...just to get a bit of variety!

I had this bedside table for ages, once bought for £10 somewhere in the area, and I decided this too needed a lick of paint. On my trip to Copenhagen recently I bought a handful of ceramic drawer knobs and they came in very handy to give the table its finishing touch. What do you think?

5897709582_92c9480876_z
5897144913_32fbdf4377_z

Sunday, July 3, 2011

Junk find becomes cool coffee table

P186 P188 P190
I'm so chuffed, I found this wee table at second-hand shop the Box Room in Banchory yesterday for £5 and a day later it's already brightened up my living room - and my life!


I painted its legs with Annie Sloan chalk paint in Duck egg blue (oh my goodness, another brilliant discovery! Go google it and get some, it's the best paint ever if you're into painting old furniture and distressing it). I then put some wax on it and lightly sanded it back to get a worn look. I just tried it out in the lounge and guess what, it's a perfect compagnon for my other recent find: the 1950s chair. We've got a winner here!
---

Saturday, April 2, 2011

Hurray! My wonderful "mid-century meets Marimekko" chair project is finished!

Finally got around to finishing the chair today, in the Spring sunshine on the patio - lovely. I'm really pleased with the result! What do you think?

Photo3 Photo Photo2

Sunday, March 13, 2011

Work-in-progress: my £12 chair goes Marimekko

I originally wanted to wait until I completely finished redoing this chair so I could show you the before and after-shots, but I just can't help myself... I'm too impatient! Here's the in-between-shot instead after I finished reupholstering the seat yesterday with gorgeous Marimekko fabric.

5441366325_e825ca8520_b

Photo
Last weekend I started stripping the wooden frame out in the garden, but it's been pretty wet and snowy the past few days and I'd rather not do this messy job indoors...! I was pleasantly surprised how beautiful the wood turned out once I took off the glossy mahogany coloured varnish. Seems it's a light maple frame with darker teak wooden arm rests. It's gonna be a stunner when I'm done :-)


Monday, February 21, 2011

Chair make-over! Reupholstering a £20 find

We finally got around getting this chair reupholstered, which I bought over two years ago for £20 from a local junk shop. It was hard choosing the right fabric, as there is just so much to choose from. Ever been in a fabric store or department? It's like putting a kid in a sweet shop!
I wanted two contrasting fabrics that were not too "in your face" and would suit the rest of the room  - and I am pretty pleased with the result. The patterned fabric is Harlequin Azara (it comes in beautiful cerise, yellow, cream, black and dark blue). The other one I have forgotten the name of, but it's a Peacock blue velvet which a lot of different fabric brands do, so it shouldn't be too difficult to find a similar one. I bought them both from John Lewis.

Here's the before and after shots!


Monday, January 17, 2011

Turning a spare room into a yoga room

Our spare bedroom upstairs is mainly used for drying laundry and dumping stuff. It also has a single bed in it and my husband's wardrobe. Tonight I decided it has more potential than that, so I tidied it up and added a bit of zen, a buddha and a candle. Voila, here's my new yoga space - combined with dressing room (to display my wonderful gig outfits) and guest bed. This may become my new favourite room in the house... now the main challenge is to keep it tidy!

Friday, November 12, 2010

Our patio project or Grand Design

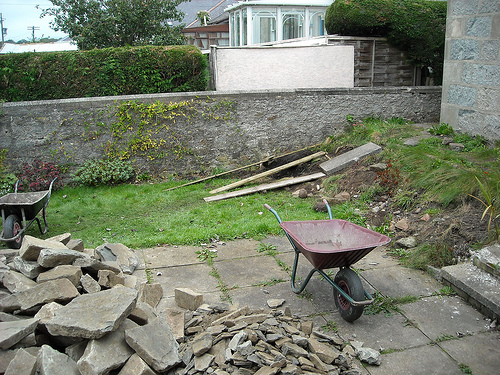
BEFORE!
BEFORE!
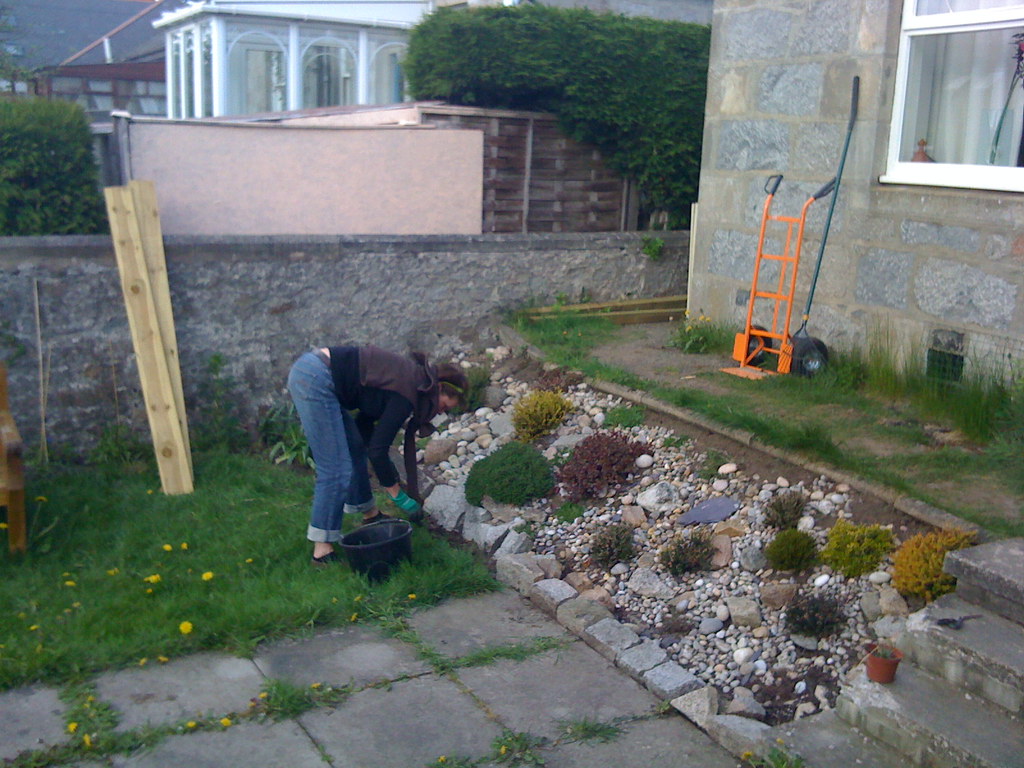
Our patio in the back garden has been en eye sore ever since we moved in three years ago but we finally got around to improving it. Glenn was keen on getting a drystone wall, but I wasn't too sure about what this would look like on a patio area. What we did know was that we preferred real stone rather than concrete, man-made slabs for pavement and walling. By asking around on facebook I found Danny, a wonderful and very talented stone mason who not only came up with a great design (something far more 'organic' and beautiful than we had come up with), but has now almost finished making it a reality.

Danny's Grand Design
We ended up building with local sandstone, pebbles and some slate - all natural. Danny salvaged some oak planks from an allotment - now used as a gorgeous build-in bench within the walling. It has been such a great, creative process - and it's been a pleasure working with our stone mason - who is anything but your typical builder (more like a free spirited, traveling surfer dude! :-).

As I say, it's not finished yet - and work is becoming harder with colder weather and less light - but I thought I'd show you some pictures of the progress so far.  I will upload more pictures once it's all done (especially next Spring when we can start putting plants in and adding the finishing touches). Can't wait till next year....barbecues on our new patio! By the way, that ugly pink screen/fencing in the back will obviously go too!

My dad, me and Glenn on our patio three years ago
Aaaah! The sandstone has arrived!! Now what...?


Glenn and Danny

Quick! The light is going! November is not ideal for patio building ...


Another bit of patio!
An outer circle will be added made of pebbles. Other parts will be filled in with soil for planting
Happy me - supervising and making lots of cups of tea for the workers...!
Our 'upper' patio is finished.... yay! Can't wait to add some plants next year.

Stay tuned... to be continued....!

----